Safe import of sensitive data
In this cookbook, we'll see how Vaulty can help you to protect the user's data when the system imports it from 3rd party service via API. Vaulty lets you control and limit data usage to minimize the potential damage in the event of a data breach.
For this cookbook, we will use a demo app that pulls data from the external API.
The goal of the guide is to show how by adding Vaulty to the demo app we can protect sensitive user data and achieve the following results:
- Emails in a database are pseudonymized (replaced with tokens and encrypted)
- Phone number, Card number, SSN and access tokens are encrypted storage
- IP address is hashed
- All data is stored in isolated storage
- Application developers have no access to plain data
Demo App
The source code of the demo app can be found here: https://github.com/vaulty-co/demo-sensitive-data-safe-import. The demo application is simplified to keep only what matters for the demo.
Here is the app architecture:

Steps of the demo application:
- The backend pulls sensitive data from external API
- The backend saves plain data in DB
- The backend displays data from DB in the browser
External API
Our external API has only one /users endpoint which provides users data:
- Full name
- Phone number
- IP
- Credit card number
- SSN
- AccessToken to access API on behalf of a user
Backend
Our backend has two endpoints:
/import- pulls data from external API and saves it in the DB/users- shows users from the DB
Run the app
To run the demo application you need to run the following commands:
From docker-compose.yml you see that we have backend service and external API:
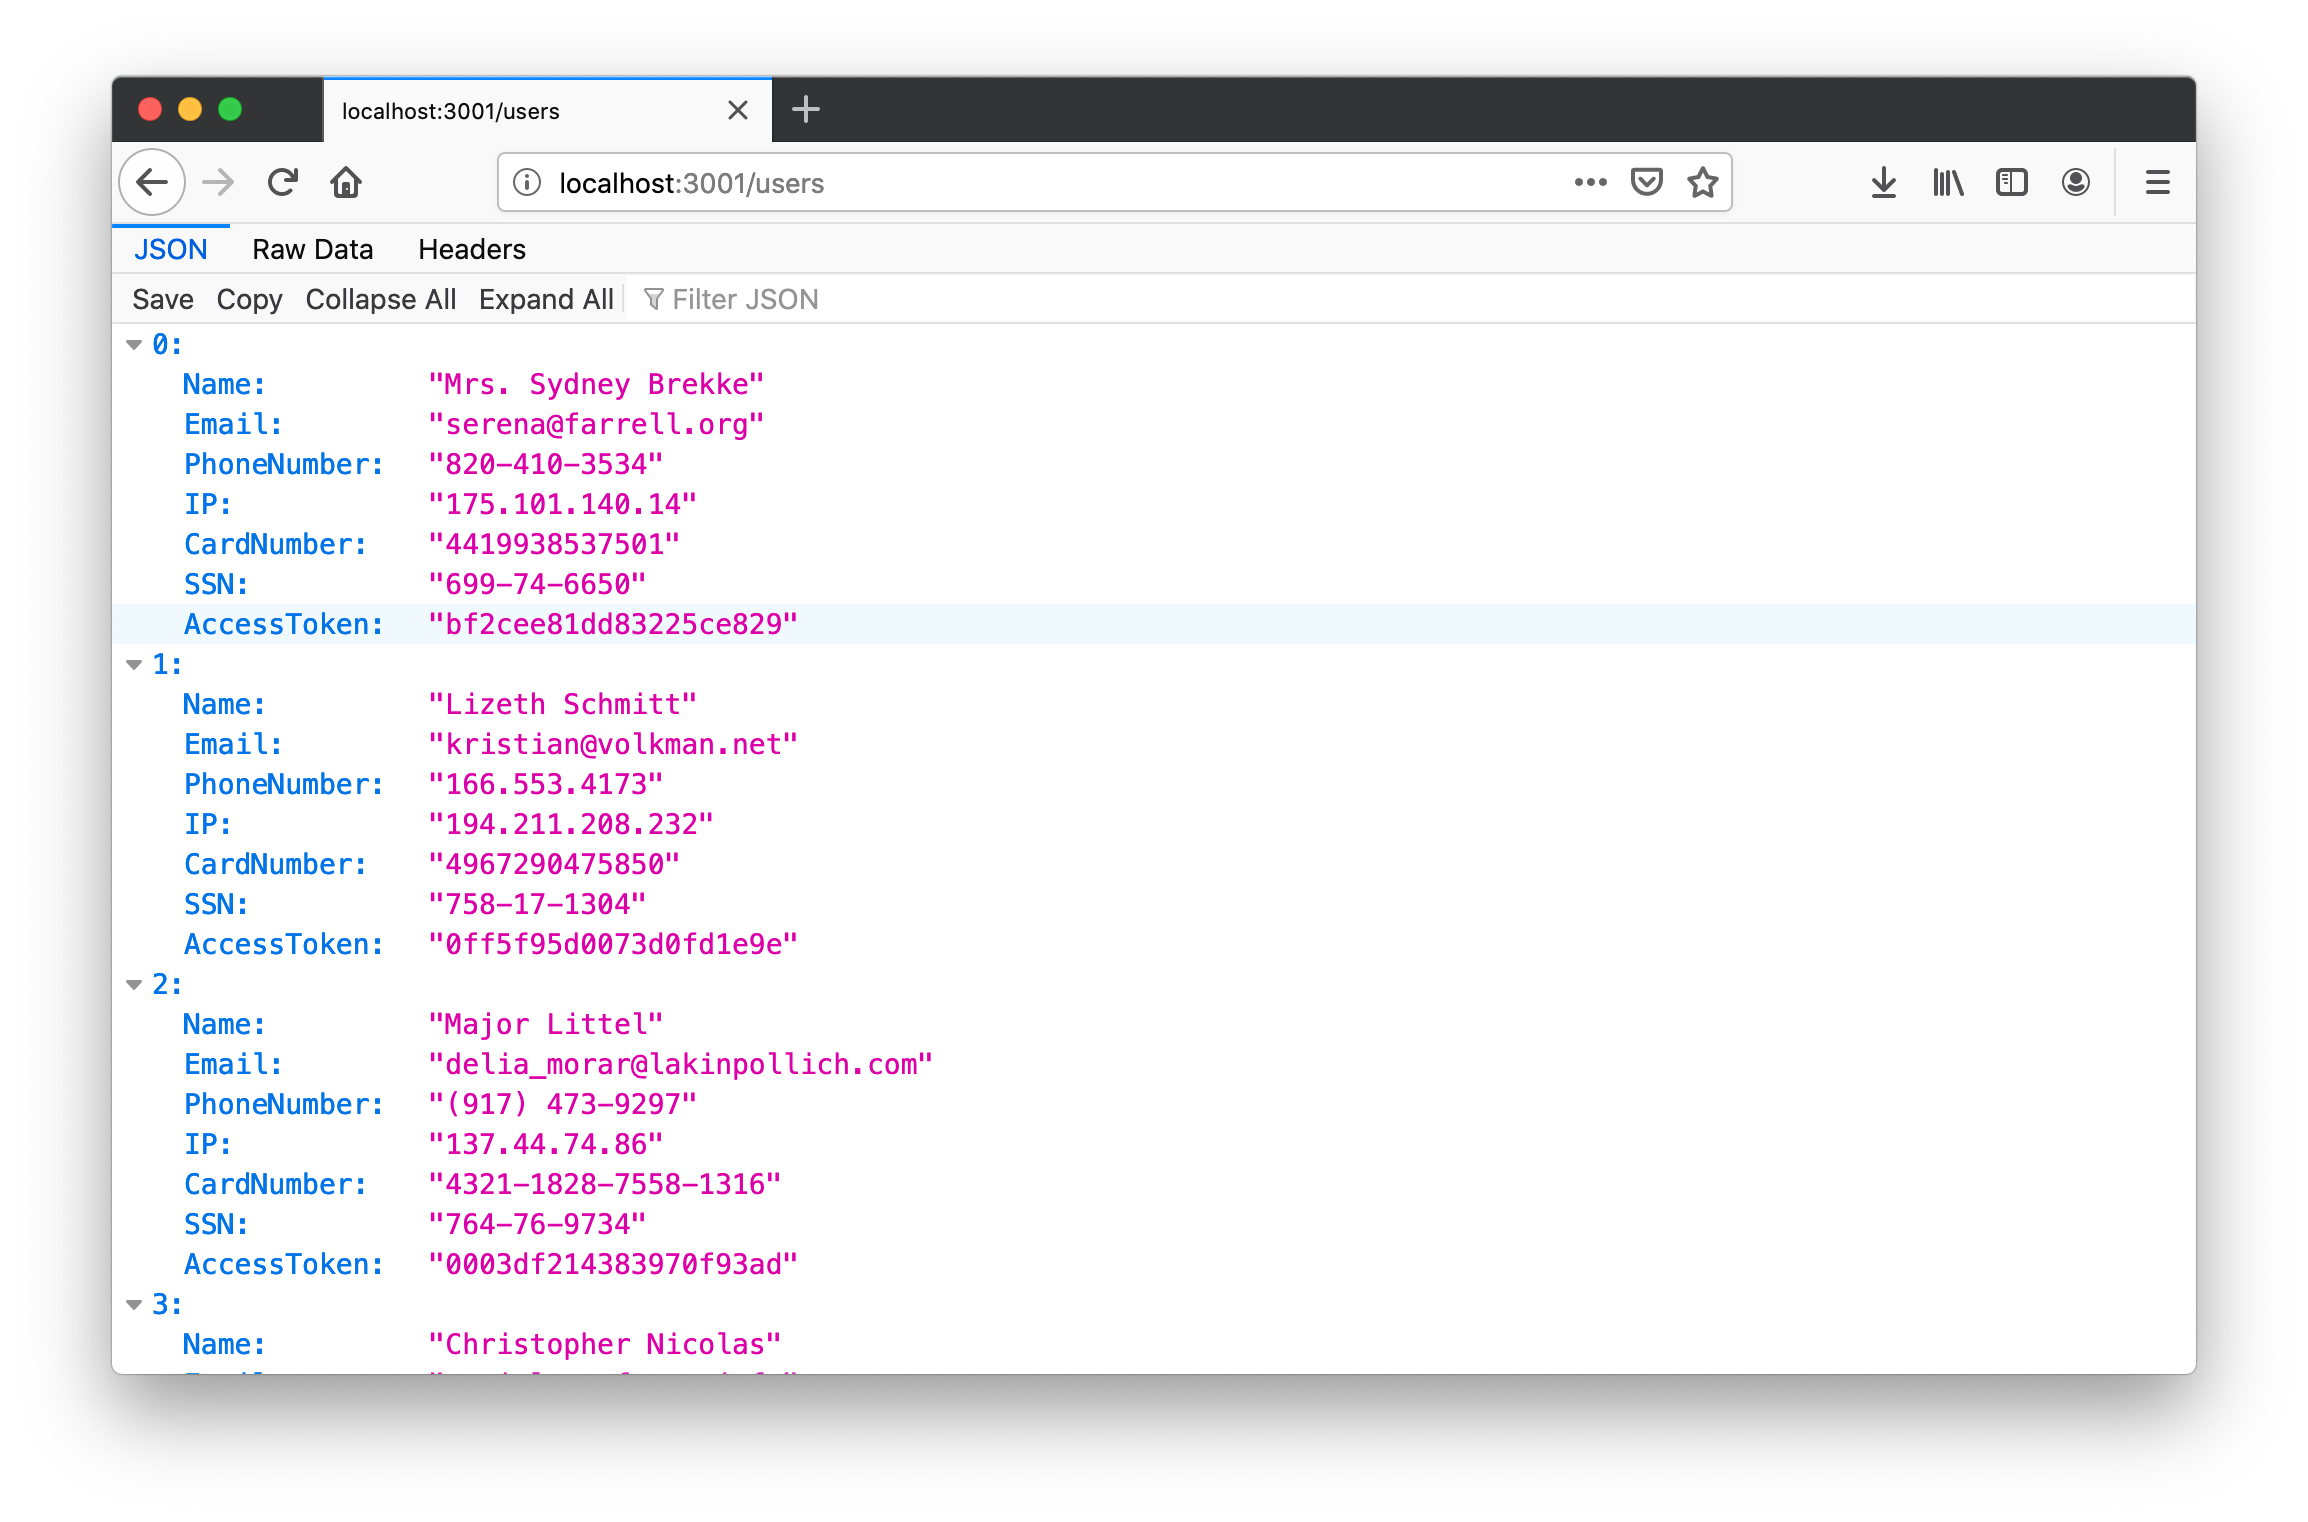
Navigate your browser to http://127.0.0.1:3001/users to see what the external API provides to us (it generates fake data for each call):
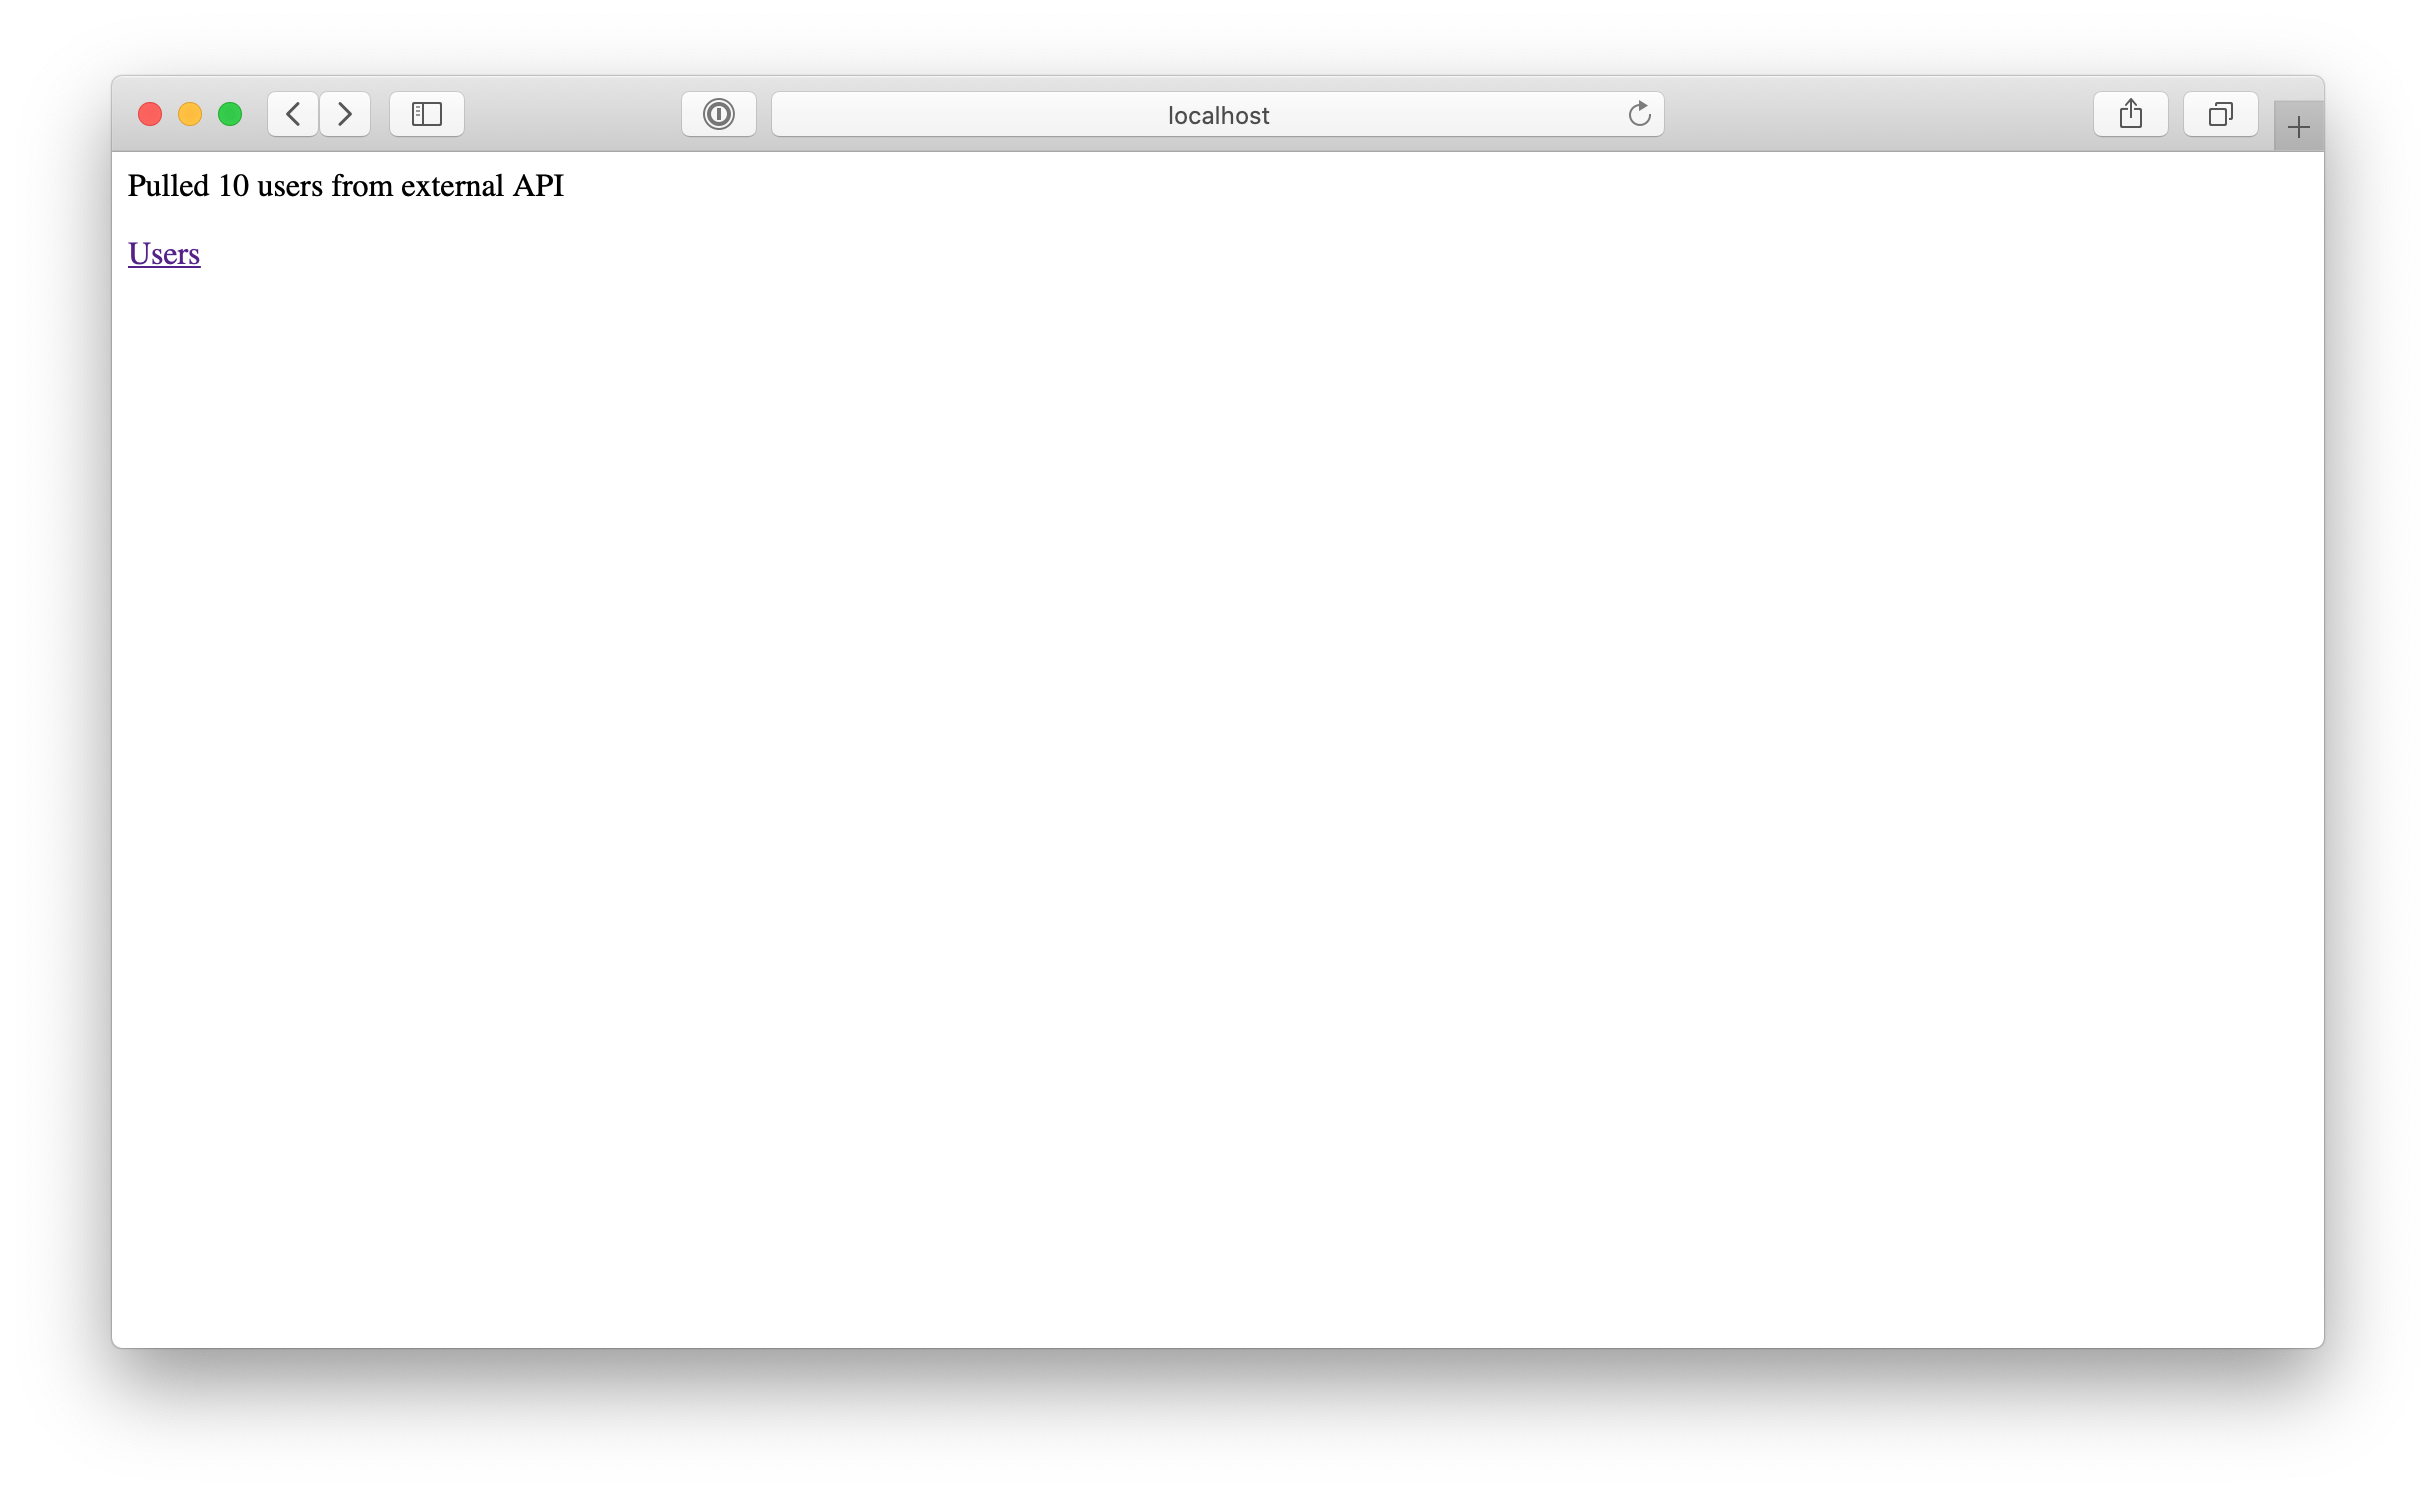
We have no users in our backend's DB. Let's import them from external API by navigating to http://127.0.0.1/import:
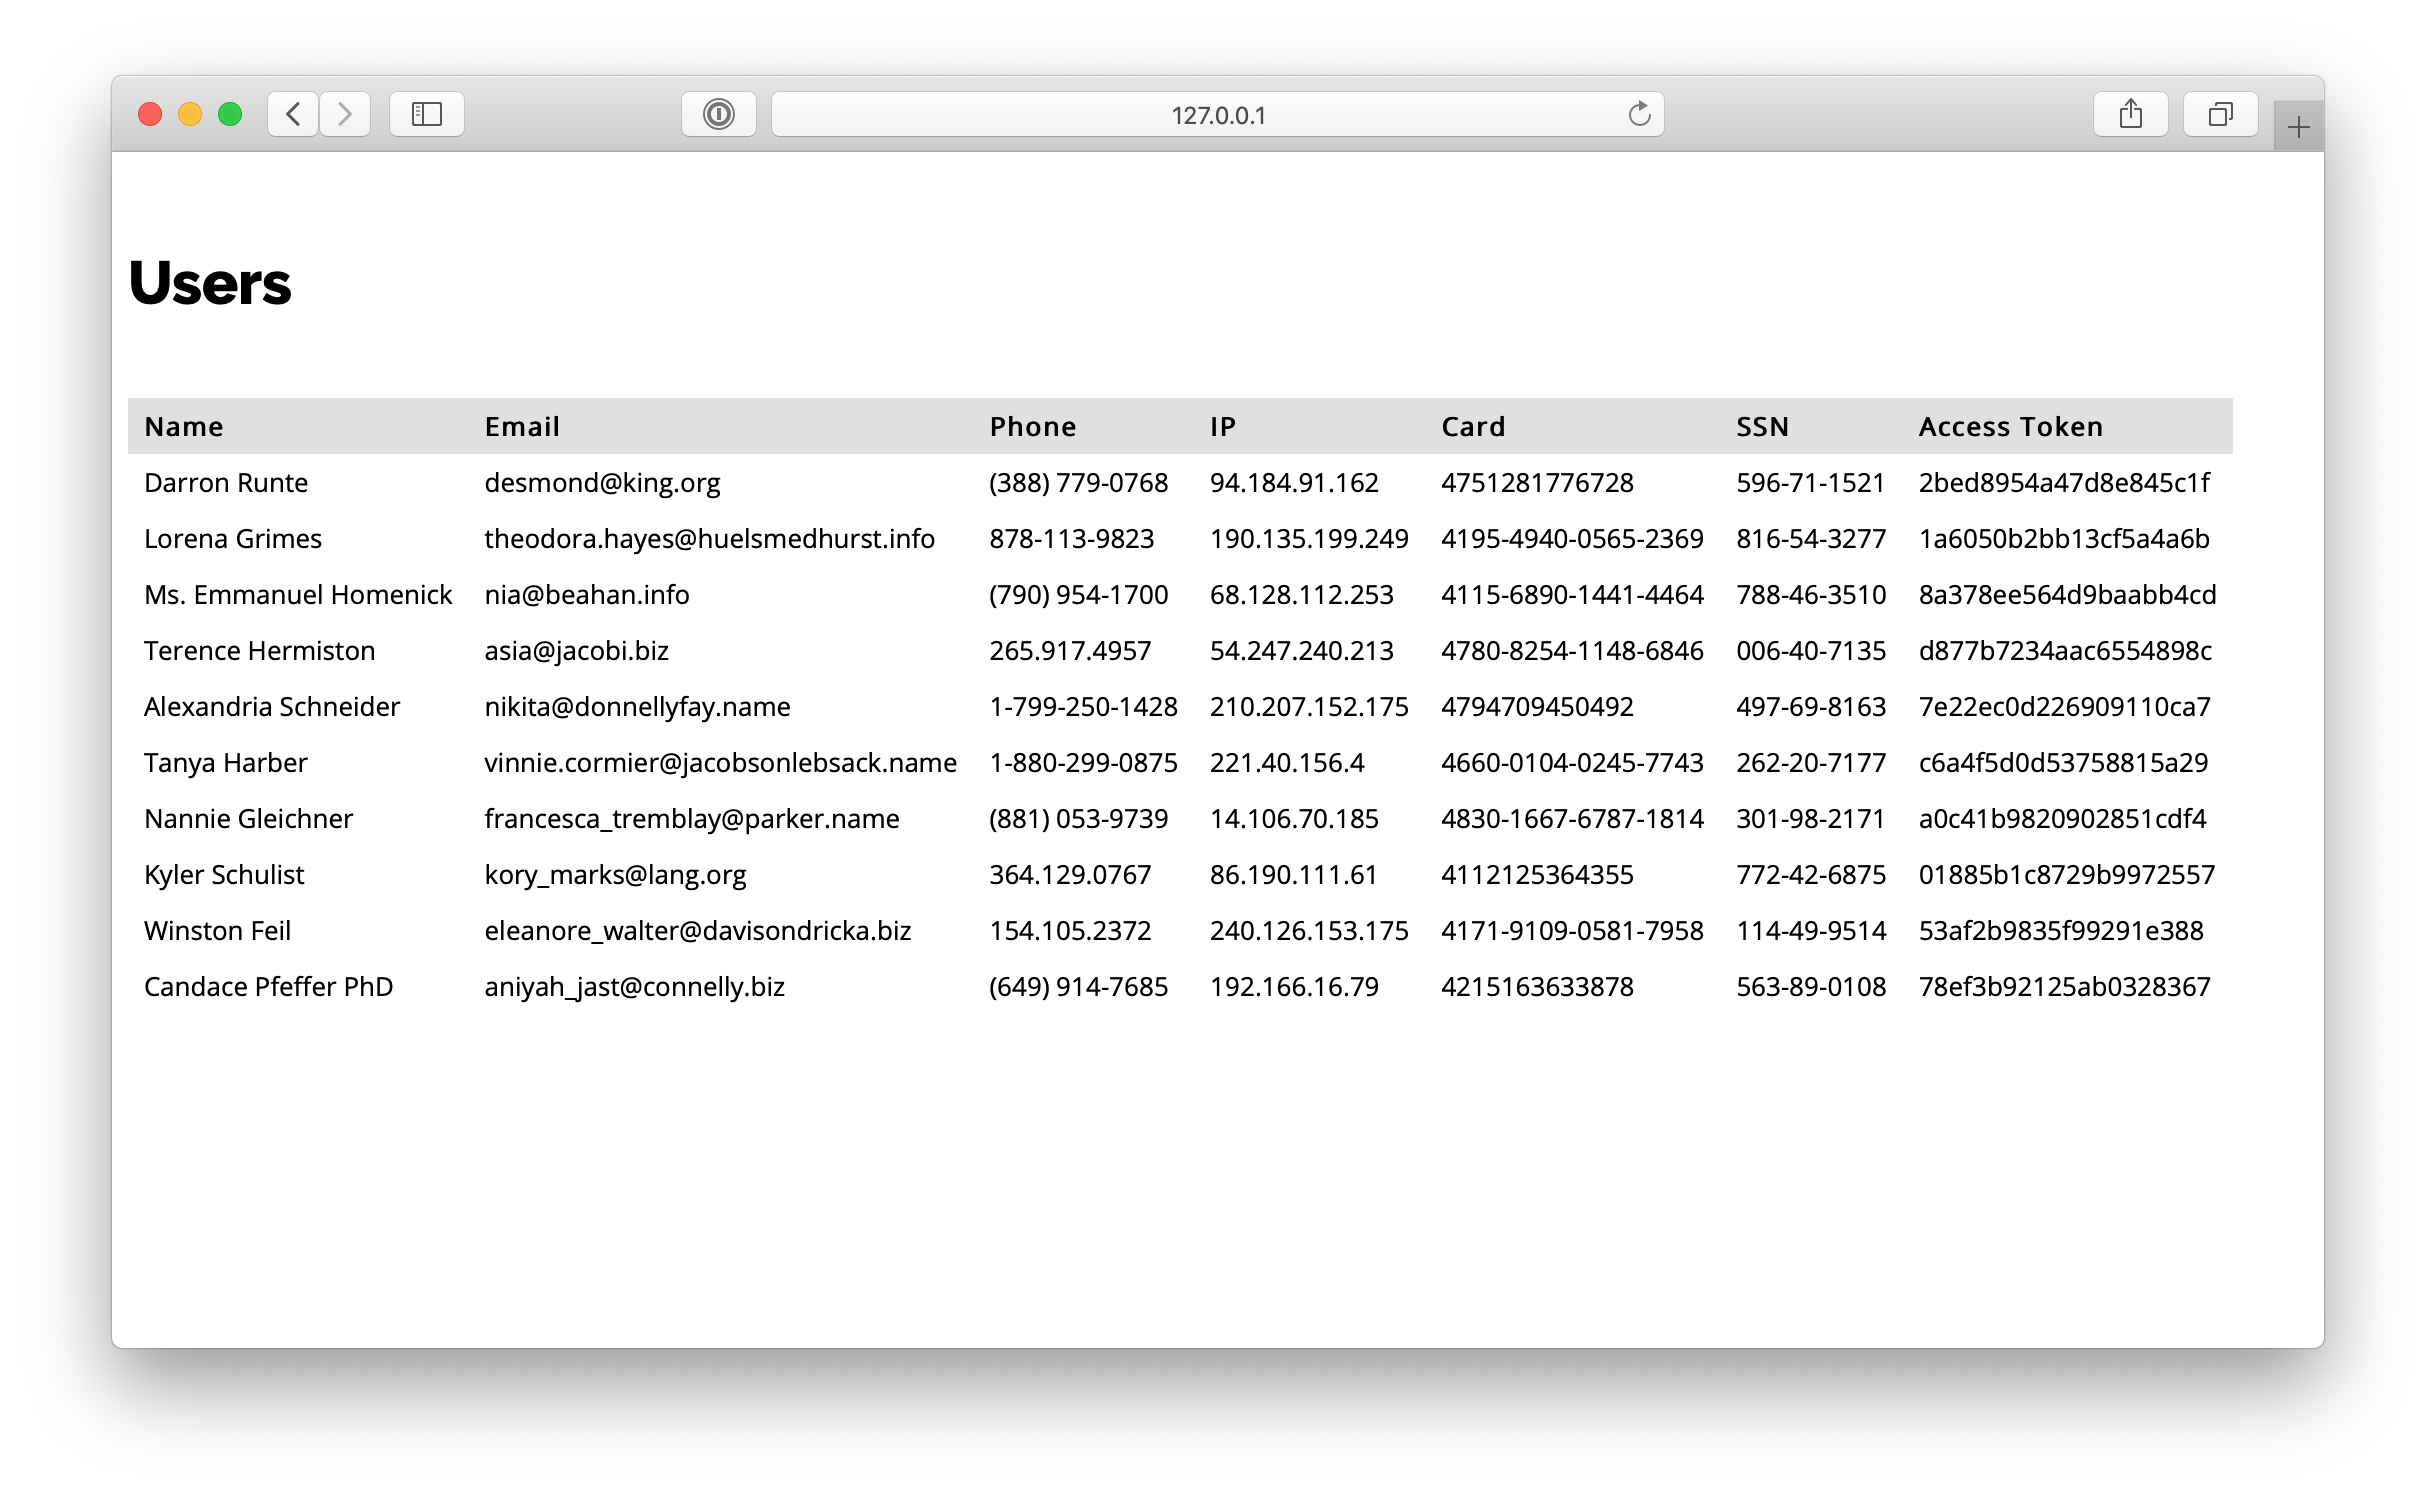
Now, let's see what do we have in our DB http://127.0.0.1/users:
As you can see, we have the same data we pulled from the external API. The problem here is that sensitive data should be properly protected. First, it should be encrypted. Second, access to it should be limited. Let's see how Vaulty can help with this.
Adding Vaulty
Vaulty will be used for the following:
- tokenize email
- encrypt phone number
- create hash for IP address
- encrypt card number
- encrypt SSN
- encrypt access token
Let's change out infrastructure by adding Vaulty as a proxy between our backend and external API. This is how changed architecture looks like:

To implement this change we copy existing Compose file into docker-compose-vaulty.yml and add vaulty service:
As you see in this Compose file we:
- link the backend service with Vaulty
- configure Vaulty via environment variables: set proxy password and encryption key.
- create volumes for backend and vaulty for the same demo app directory. Vaulty will generate the root CA certificate and the key in this directory and the backend will use the CA certificate for HTTP client.
- we run Vaulty proxy in debug mode so we can easily create transformation rules for json elements. Debug mode should not be used in production
Also, let's add the following Vaulty configuration parameters into .env file:
ENCRYPTION_KEY- key to encrypt/decrypt data
Our .env file:
Also, in /vaulty directory we should create routes.json with the outbound route that will let all requests to pass through Vaulty to our external API:
Vaulty is setup now. Let's stop our services and start them again but this time with Vaulty:
Import users from external API by visiting this url: http://127.0.0.1/import
In the terminal we can see the dump of the external API response:
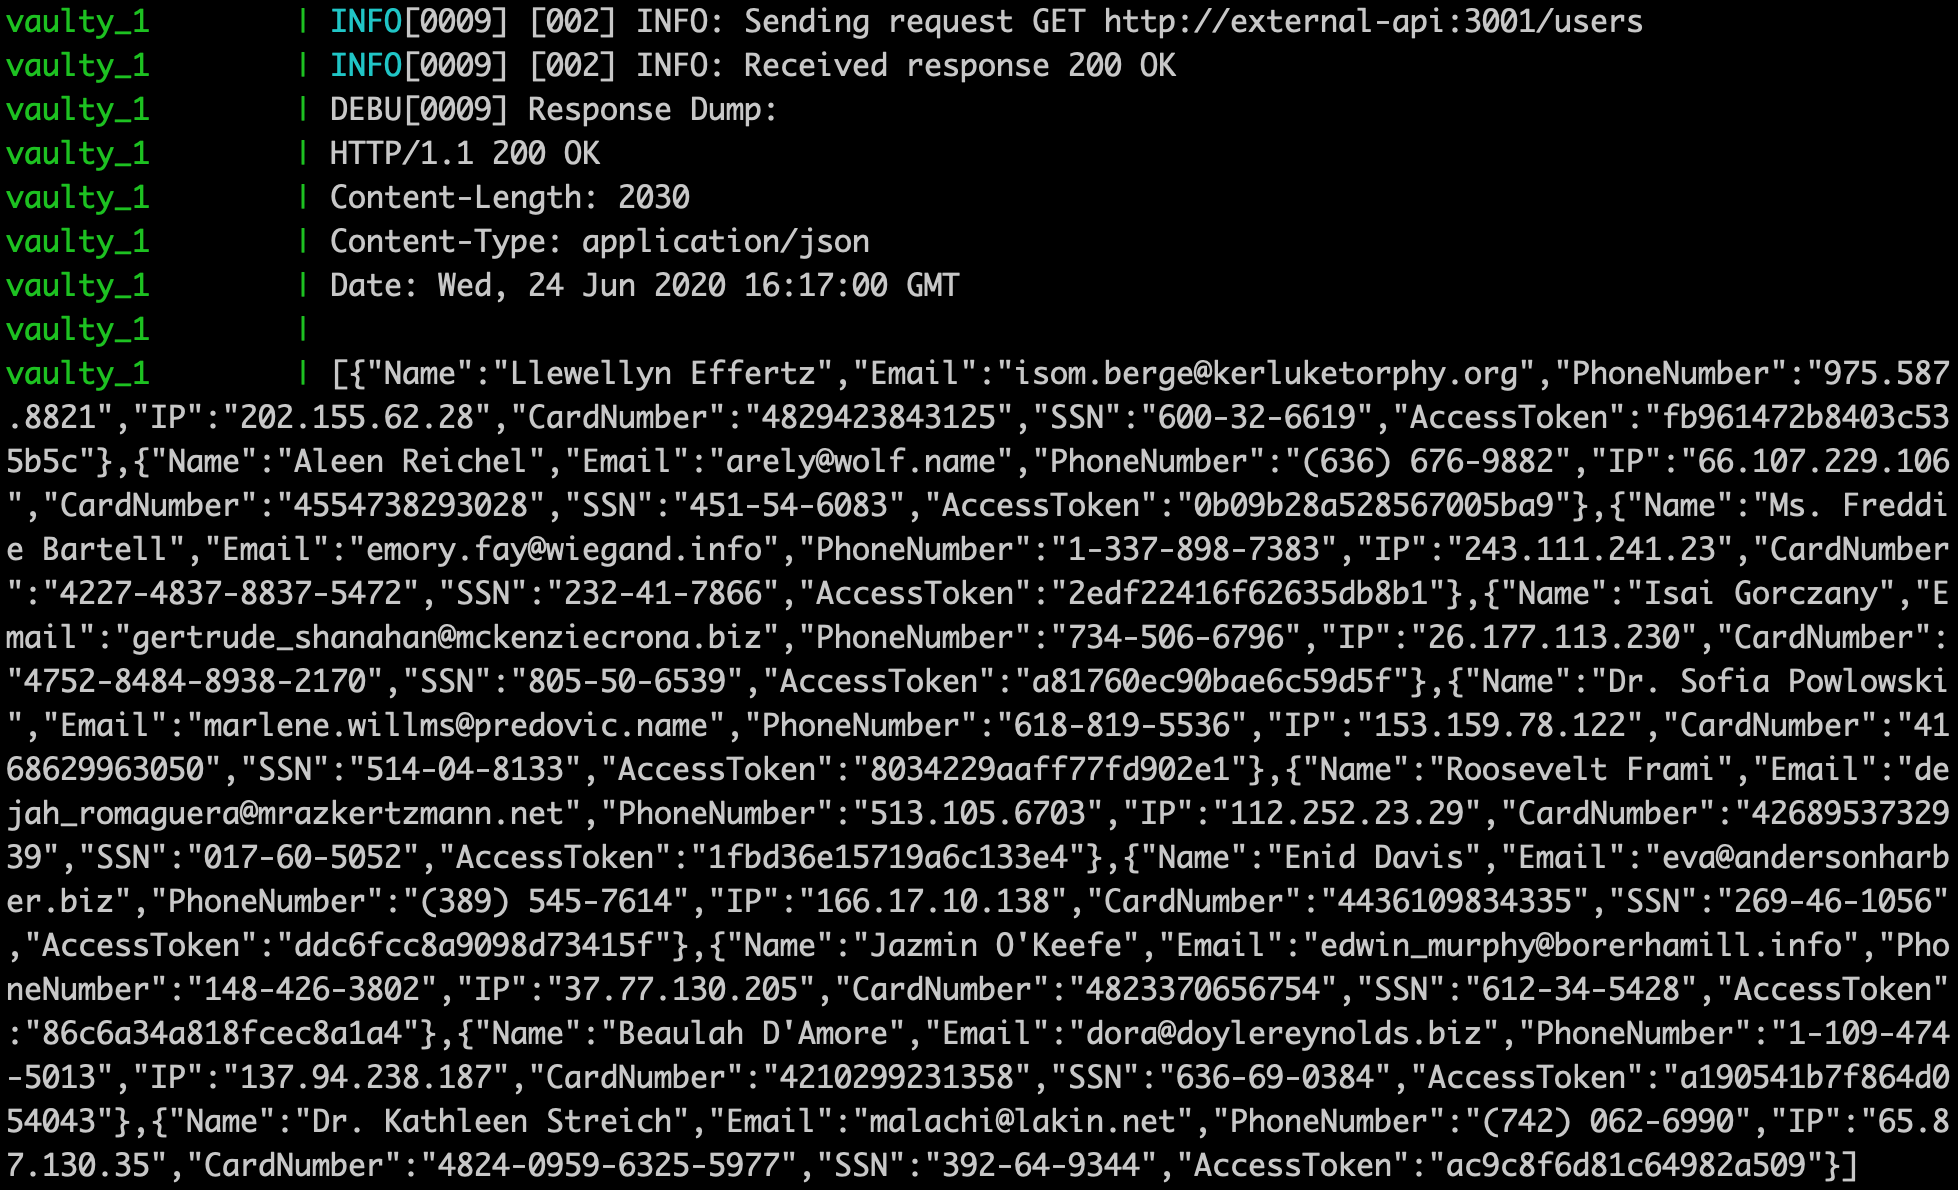
We see the URL of the request and JSON body of the response. Now we can create a route and transformations for the response.
Transformations
Here is what we want to do with sensitive data we receive from external API:
- tokenize email
- encrypt phone number
- create a hash for IP address
- encrypt card number
- encrypt SSN
- encrypt access token
Let's start from adding new route and first transformation for the email attribute:
As you can see, our route is named "out-import-users". Transformations of this route will be only applied to GET requests sent to http://external-api:3001/users. As our response is in JSON format, we use json transformation. Our response is the array of objects containing data we want to protect. To tokenize Email element, we use #.Email path in expression parameter of the transformation (# - is used to query an array).
Let's restart our services (it cleans up DB and reloads Vaulty):
Now, import users from external API by visiting http://127.0.0.1/import. Next, visit http://127.0.0.1/users to see what we have in DB:

You see that Email is tokenized. There are no original emails in our DB anymore. You can find how to use tokenized emails with services like SendGrid or MailGun in this cookbook.
Let's transform the rest of the data by adding more transformations to our route:
Restart our services:
Import users again via http://127.0.0.1/import and check how sensitive data was protected here http://127.0.0.1/users
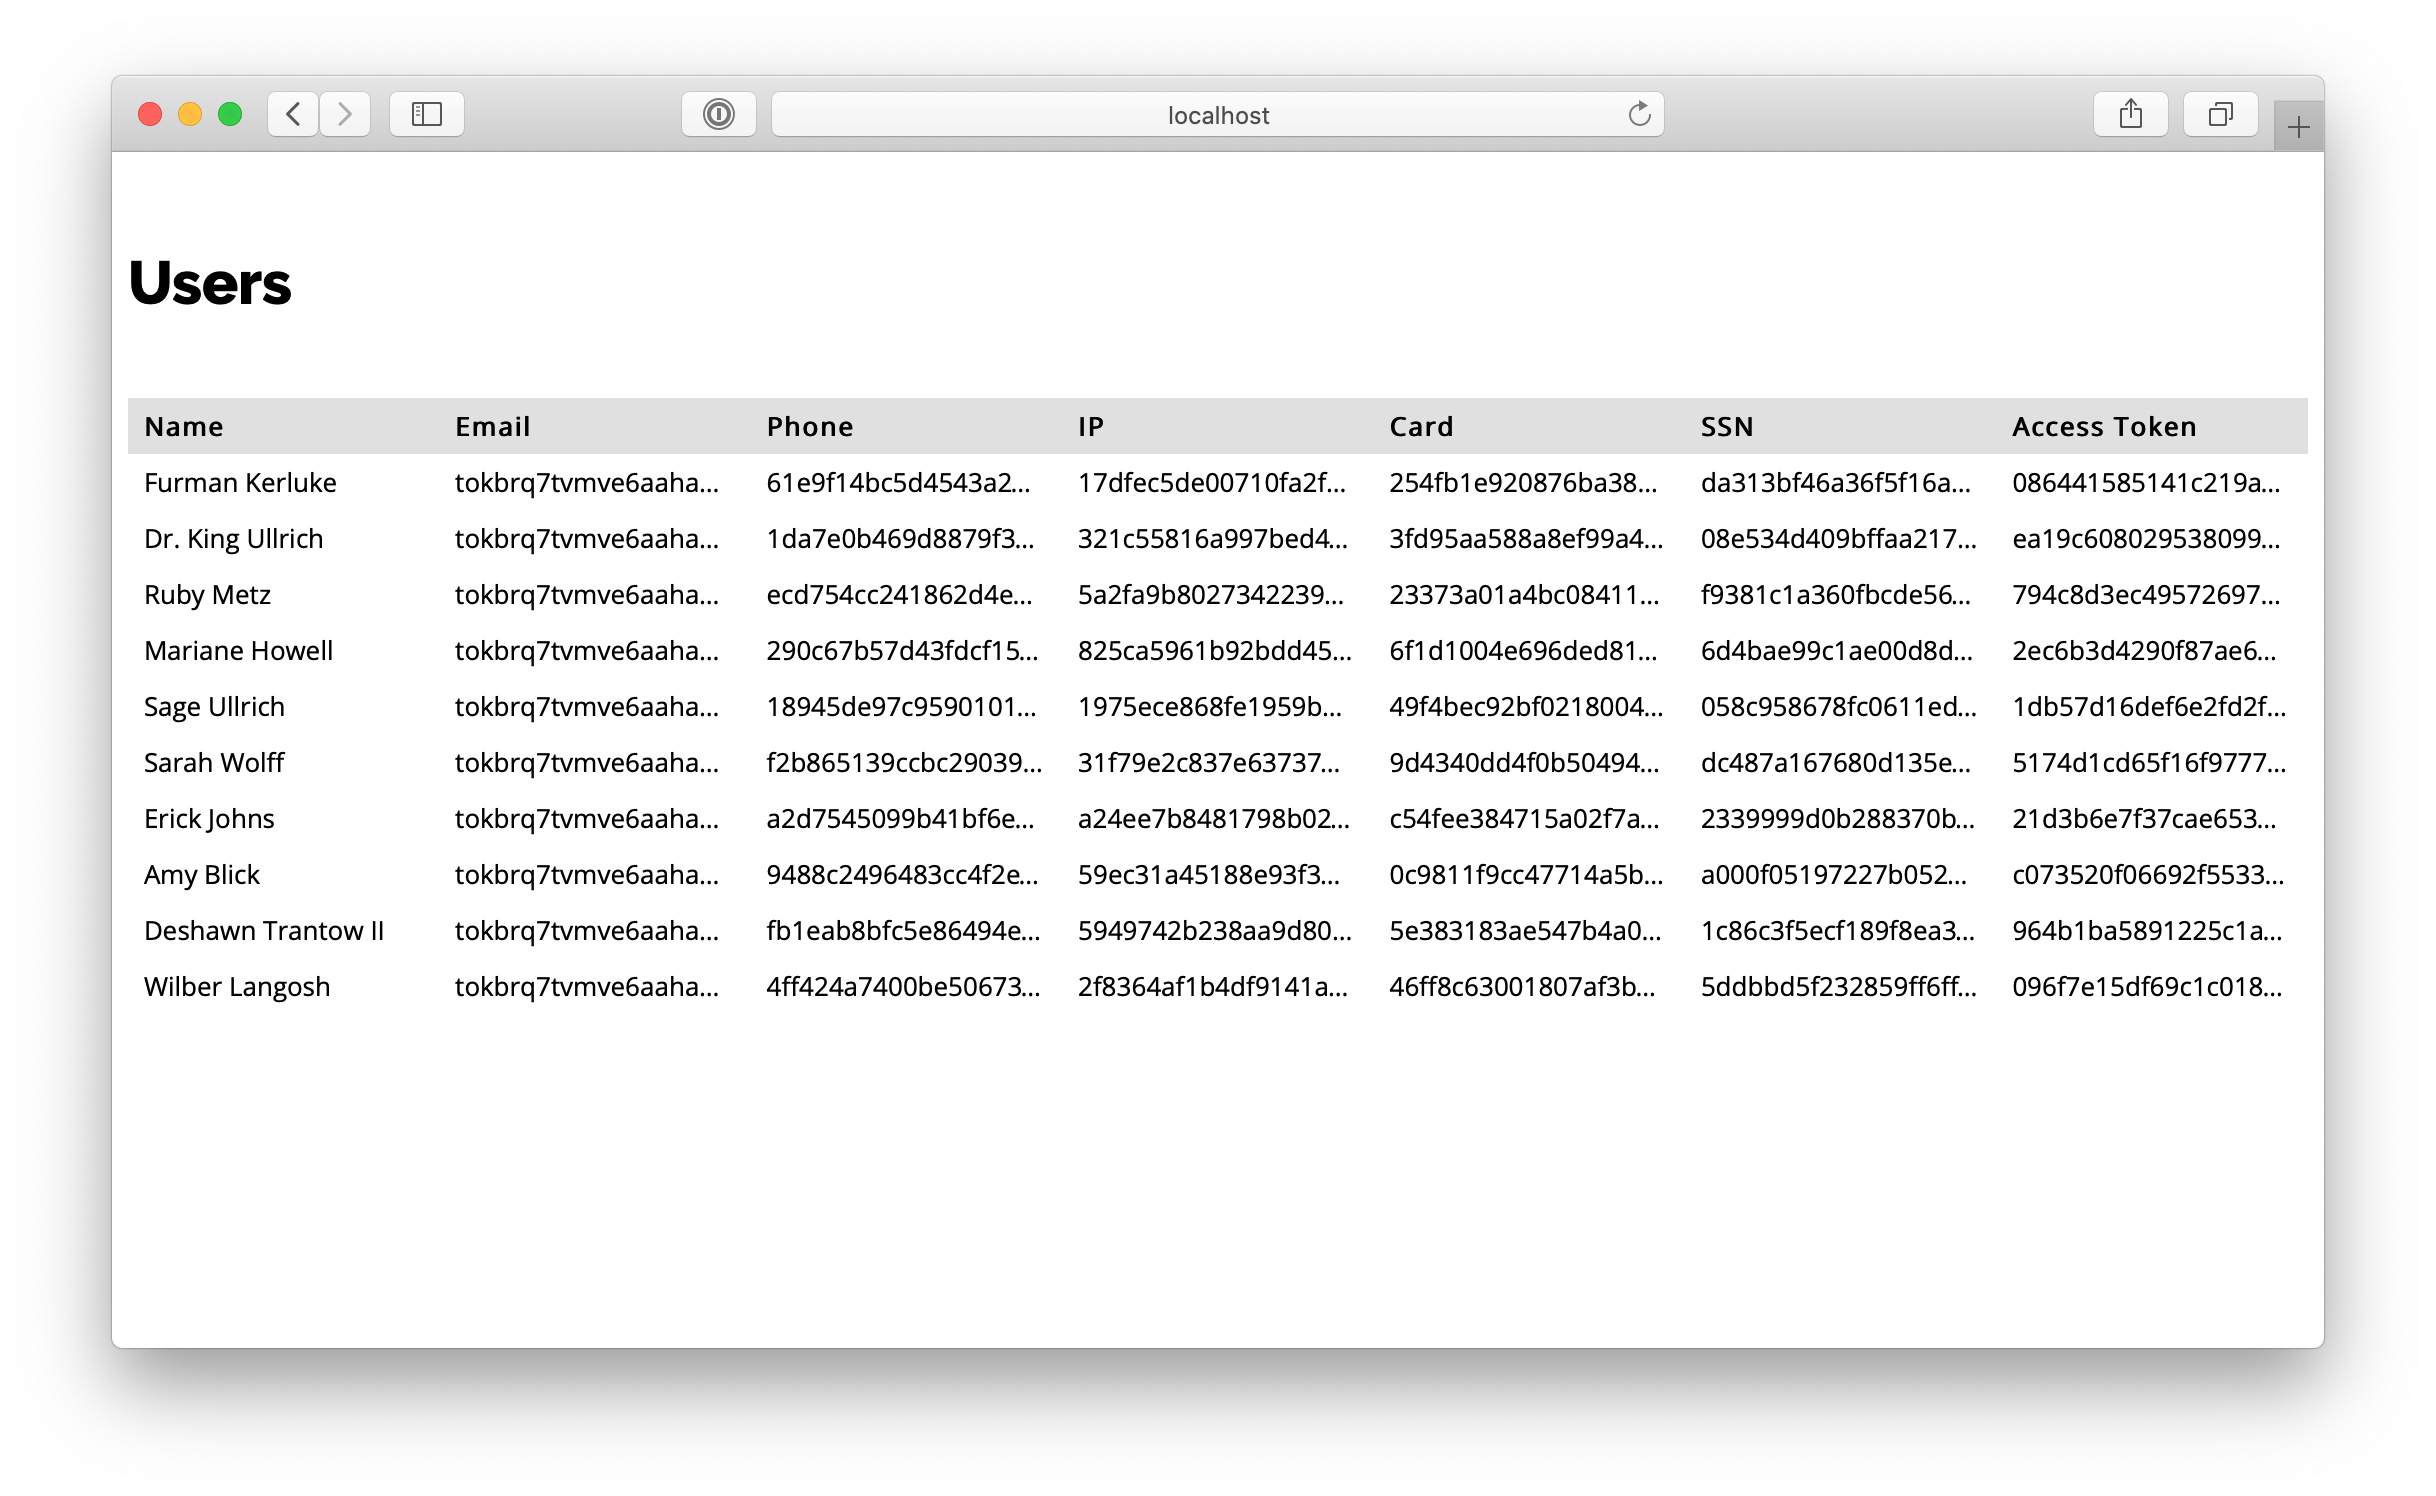
Summary
We have achieved the goal of this cookbook. Now all data we pull from external API and store in local DB is protected (encrypted, hashed, tokenized). Tokenized data is stored inside Vaulty as well as an encryption key. It is much easier for you to protect sensitive user data with tiny isolated services like Vaulty.
All this was achieved without application code changes. Only by setting Vaulty as a proxy.
Please, submit questions and your feedback! We would be glad to help you with setting up Vaulty!